
A smooth recovery from a tooth extraction comes down to what you do right after you leave our office. Those first 24 hours are absolutely crucial. This is the window where you lay the groundwork for fast, complication-free healing, and the main goal is to protect the extraction site so a stable blood clot can form.
The First 24 Hours: Your Blueprint for Healing
The minute you’re out of the dental chair, your body kicks into healing mode. Think of that first day as setting the stage for the entire recovery process. Your one and only job is to protect that empty socket. A blood clot will start to form there, and it's essentially nature's perfect bandage, shielding the bone and nerves underneath.
Your dentist will place a folded piece of gauze over the site, and your first task is to bite down on it with firm, steady pressure. Don't chew on it; just apply constant pressure. This is the single most important step for stopping the bleeding and helping that vital clot to form. Keep that pressure going for at least 30-45 minutes.
Managing Bleeding and Protecting the Clot
Once you’re home, keeping that blood clot safe and sound is still the top priority. A little bit of oozing or some blood-tinged saliva is perfectly normal, but you shouldn't see any heavy, active bleeding. If the bleeding seems a bit persistent, just swap out the old gauze for a fresh, clean piece, fold it up, and get back to biting down.
Now, here's what you absolutely must avoid doing to keep that clot from getting dislodged:
- Don't Spit: Any forceful spitting creates a surprising amount of pressure in your mouth that can easily yank the clot right out.
- No Straws: The suction needed to sip through a straw is a notorious culprit for dislodging the clot and causing a painful condition called dry socket.
- No Smoking or Vaping: Besides introducing chemicals that can hinder healing, the sucking motion is just as bad as using a straw.
- Don't Rinse Aggressively: When you need to get liquid out of your mouth, just let it gently fall out into the sink.
Controlling Swelling and Discomfort
Swelling is a totally normal part of the body's response to surgery. To get a handle on it before it starts, grab an ice pack or a bag of frozen peas and apply it to the outside of your cheek near the extraction area. We always tell our patients to follow a 15-minutes-on, 15-minutes-off cycle throughout that first day. It works wonders for minimizing inflammation and even provides a bit of natural numbing.
For a deeper dive, our team put together a comprehensive guide on proper tooth extraction aftercare that walks you through every part of the healing journey.
This visual guide breaks down the three pillars of a successful first day: getting plenty of rest, managing your pain, and sticking to soft foods.
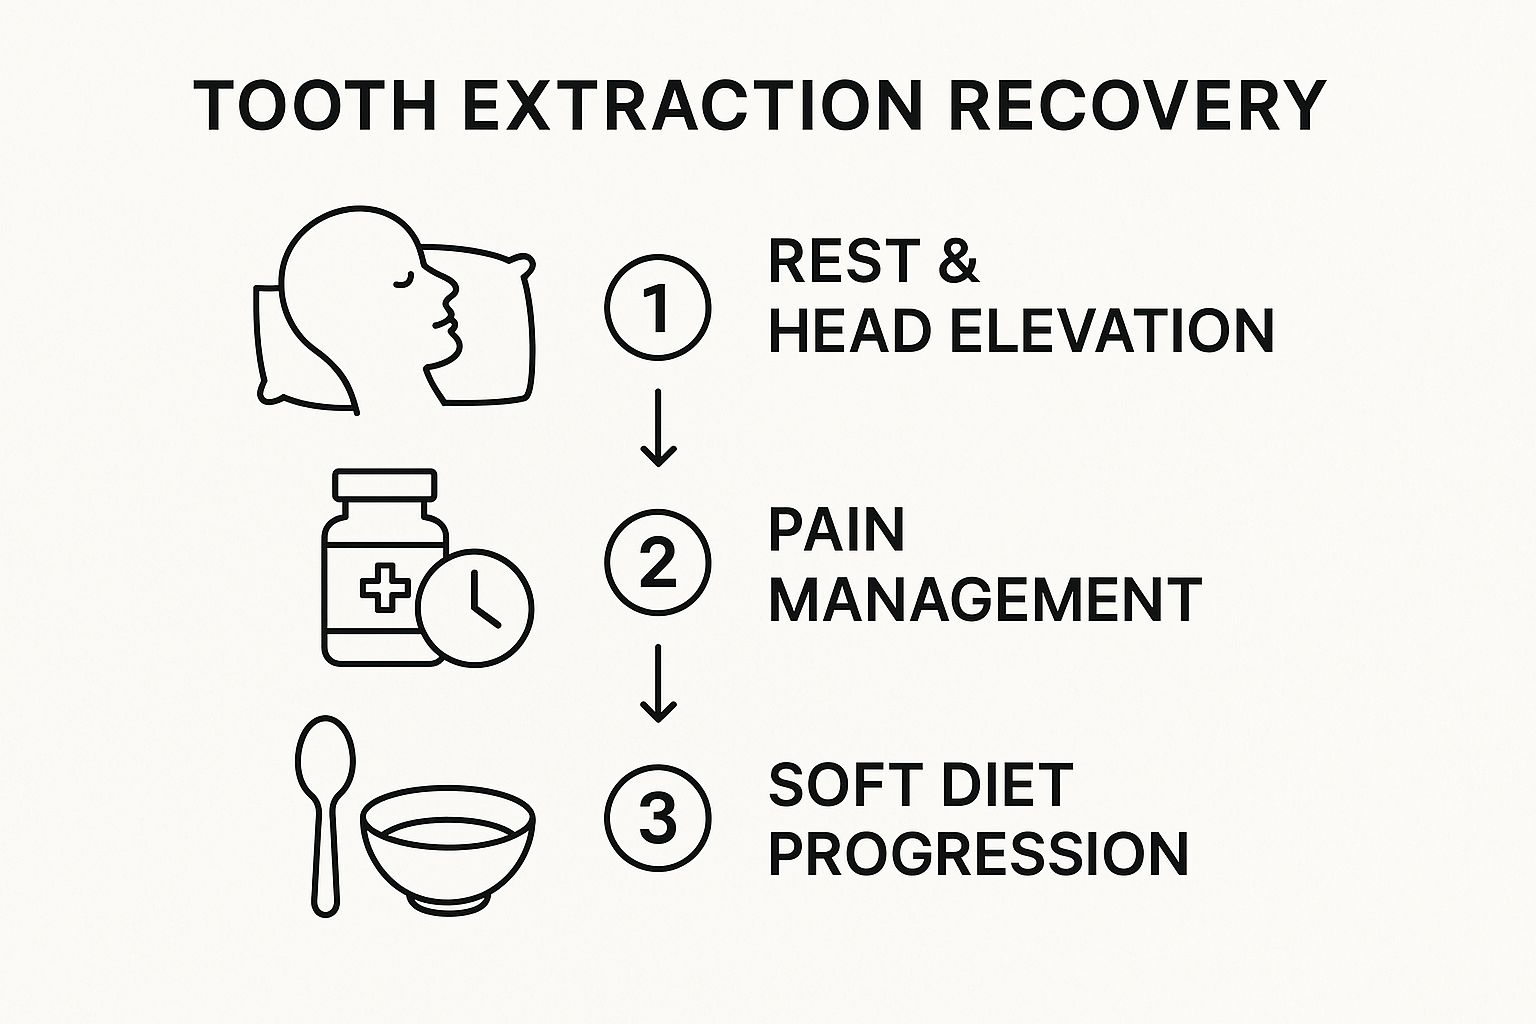
If you can nail these three things—prioritizing rest, taking your pain medication on schedule, and eating the right foods—you create the perfect environment for your body to heal efficiently.
Most people follow a fairly predictable healing timeline. Bleeding should stop within the first 8 hours or so, and any swelling you experience will likely peak around day two or three. By the time you hit the one-week mark, you should feel a whole lot better. To learn more about the dental extraction healing process, you can find more detailed timelines and other factors that can influence recovery.
Navigating Pain and Swelling on Days Two and Three
As you roll into the second and third days of recovery, you’ll start to notice a real shift. This is typically when swelling hits its peak, so it’s time to change up your comfort strategy a bit.
The ice pack that was your best friend on day one can now be swapped out for a warm, moist compress. Just soak a washcloth in warm water, wring it out, and hold it against the outside of your cheek. That gentle warmth does wonders for boosting circulation, which can help bring down the swelling and ease any tightness in your jaw.
Easing Discomfort with Smart Pain Management
During this phase, staying on a regular schedule with your pain medication is key. The idea is to manage the discomfort before it gets a chance to ramp up. Whether you're using something over-the-counter like ibuprofen or a prescription from us, taking it consistently will keep pain from getting in the way of your healing.
Key Takeaway: Don't tough it out and wait for the pain to become severe. Sticking to the prescribed schedule is the best way to stay comfortable and let your body focus all its energy on healing.
If you're curious about other ways to find relief, our guide on tooth pain home remedies has some great tips that can work alongside your dentist's instructions. You might also find it helpful to explore some natural chronic pain relief methods for broader strategies to manage discomfort.
Keeping the Extraction Site Clean
The other big focus now is keeping the extraction site clean without messing with the delicate healing process. Once the first 24 hours have passed, you can safely start using gentle salt water rinses. This is a simple, old-school trick that works incredibly well to prevent infection.
How to Make and Use a Salt Water Rinse:
- Mix the Solution: Stir half a teaspoon of regular table salt into an 8-ounce glass of warm (not hot!) water until it dissolves.
- Rinse Gently: Take a sip and just tilt your head from side to side, letting the warm water wash over the area. No vigorous swishing!
- Don't Spit: This part is critical. To protect that all-important blood clot, simply lean over the sink and let the water fall out of your mouth.
- Repeat: Do this 2-3 times a day, especially after you eat, to gently flush away any stray food particles.
By carefully managing the swelling, staying ahead of any pain, and keeping the area clean, you’re setting yourself up for a smooth and speedy recovery. These small but important steps really do make all the difference.
Your Post-Extraction Diet: What You Can Actually Eat
Knowing what to eat after a tooth extraction can feel like a puzzle. But getting your nutrition right is one of the most important things you can do to ensure a smooth, quick recovery. The basic idea is to start soft and work your way back to your normal diet as your mouth heals.
For the first 24 to 48 hours, your diet is going to be all about cool, soft, and liquid foods. The main goal here is simple: nourish your body without bothering the extraction site. This is all about protecting that vital blood clot that’s forming.
Safe Foods for the First Few Days
Right after the procedure, you'll want foods that require zero chewing. This isn't just about comfort; it's about protecting the healing socket from any kind of pressure or disruption.
- Cool Smoothies: These are fantastic, but with a couple of ground rules. Stick to smooth fruits like bananas and avocados blended with yogurt or milk. And whatever you do, do not use a straw. Also, skip fruits with tiny seeds, like strawberries and raspberries, for now.
- Yogurt and Applesauce: These are your best friends in the first day or two. They're soft, cool, and couldn't be easier to eat.
- Chilled Soups: Think smooth, blended soups like a gazpacho or a creamy tomato soup that you've let cool way down. They’re a great way to get some nutrients in.
- Pudding and Jell-O: Sometimes a little comfort food is just what you need, and these are perfectly safe for the healing area.
Once you’re past that initial 48-hour window, you can slowly start bringing in warmer foods and things with a bit more substance, like mashed potatoes or scrambled eggs.
Pro Tip: When you do start eating again, make a conscious effort to chew on the side of your mouth opposite the extraction site. It’s a simple habit, but it makes a huge difference in preventing irritation.
Foods and Drinks You Must Avoid
What you don’t eat is just as critical as what you do. The wrong food can easily dislodge the blood clot—which you definitely want to avoid—or just cause a lot of unnecessary pain.
For at least the first week, you need to steer clear of these:
- Crunchy or Hard Foods: Things like chips, nuts, popcorn, and hard candies are a real hazard. Tiny, sharp pieces can get lodged in the socket and cause infection or disrupt healing.
- Spicy and Hot Foods: A healing gum is incredibly sensitive. Anything too hot (temperature-wise) or spicy will cause immediate irritation and discomfort.
- Sticky Foods: Avoid taffy, caramel, and gummy candies at all costs. They can grab onto the healing tissue or any stitches and pull them loose.
- Acidic Foods and Drinks: Citrus juices, sodas, and even some fruits can really sting the wound and may slow down the healing process. For a more complete rundown, check out our guide on acidic foods and beverages to avoid.
- Alcohol: This is a big one. Alcohol can interfere with any pain medication you're taking and actually slow down your body's ability to heal itself.
By being mindful of your diet, you're not just avoiding pain—you're actively helping your body heal as efficiently as possible.
Healing Beyond the First Week

Once you've made it past that first week, you should be feeling a whole lot better. The worst of the swelling and discomfort is likely behind you, and you're probably itching to get back to normal. While you're definitely on the home stretch, your body is still hard at work healing things under the surface. This next phase is all about easing back into your old habits while protecting that healing tissue.
You can start making your oral hygiene routine look a bit more familiar now. It’s okay to begin gently brushing the teeth next to the extraction site, but be sure to use a soft-bristled toothbrush. Think light, careful strokes, and whatever you do, don't directly touch the healing socket itself—it’s still very delicate.
Recognizing Healthy Healing Signs
It really helps to know what you're looking for as your body continues to mend. A healthy healing process has a few key signs that can let you know everything is on track.
- Shrinking Gum Tissue: You’ll see the gum tissue around the socket slowly start to close up the gap.
- Less Soreness: Any tenderness that's still hanging around should be fading more and more each day.
- No Severe Pain: A huge green flag is the absence of any throbbing or radiating pain. This means you’ve successfully sidestepped complications like a dry socket.
- Healthy Color: The tissue in the area should look like the rest of your gums—pink and healthy, not an alarming bright red or white.
Your follow-up appointment is more than just a quick check-in. It's a critical part of your recovery. This is when your dentist can get a professional look at the healing site, take out any stitches that aren't the dissolvable kind, and give you the official all-clear that things are progressing perfectly.
Thinking About Your Smile's Future
Now that the immediate recovery is mostly behind you, it’s the perfect time to think long-term. Leaving that new gap in your smile can cause the neighboring teeth to start shifting, which can throw off your bite and cause other issues down the road. That’s why it’s so important to have a conversation with your dentist about tooth replacement options.
One technique to consider is post-extraction alveolar ridge preservation (ARP). Here’s why it matters: without it, the jawbone where the tooth used to be can shrink by up to 50% in as little as 12 weeks. This kind of bone loss can make future procedures, especially dental implants, much more complex. ARP helps hold onto that bone, creating a solid foundation for whatever replacement you choose. You can learn more about the importance of preserving bone after extraction and how it sets you up for better long-term success.
Options like dental implants, bridges, or partial dentures are all great ways to restore full function and keep your teeth properly aligned. Your follow-up visit is the ideal opportunity to talk through which solution makes the most sense for you, ensuring your smile stays healthy and complete for years to come.
How to Spot and Prevent a Dry Socket

While almost all tooth extractions heal perfectly, the one complication everyone seems to have heard of is the dreaded dry socket. Let's break down what it is and, more importantly, how you can steer clear of it for a much smoother recovery.
Think of the blood clot that forms in the empty socket as nature's perfect bandage. It protects the underlying bone and sensitive nerve endings. A dry socket, or alveolar osteitis, happens when that crucial blood clot gets knocked out or dissolves too early.
When that protective barrier is gone, the sensitive bone and nerves are exposed to everything in your mouth—air, food, and bacteria. The result? Significant, unnecessary pain.
Identifying the Telltale Signs
The main symptom of a dry socket is hard to miss. It's a severe, throbbing pain that usually kicks in about 2-4 days after your extraction, just when you'd expect to be feeling better.
This isn't a minor ache; it's a deep, radiating pain that can travel up to your ear, eye, or neck on the same side. Often, standard over-the-counter pain relievers won't even make a dent.
Other clues to watch for include:
- Looking into the socket and seeing whitish bone instead of a dark, healing clot.
- A persistent bad taste in your mouth or noticeable bad breath.
- Pain that gets worse over time instead of gradually improving.
If you're noticing any of these signs, don't just try to power through it. This is your cue to call our office right away for proper care.
Actionable Steps to Prevent a Dry Socket
The good news is that preventing a dry socket is almost entirely in your hands. It all comes down to one simple goal: protect that blood clot, especially during the critical first 72 hours.
Here’s your game plan for keeping that healing site safe:
- No Suction, Period: This is the golden rule. Any sucking motion creates negative pressure that can easily pull the clot right out. That means absolutely no straws, smoking, or vaping.
- Don't Spit: It's surprising how much force a simple spit can generate. When rinsing, just open your mouth and let the water gently fall out. No swishing, no spitting.
- Keep to Soft Foods: Stay away from anything hard, crunchy, or crumbly. Small bits of chips, nuts, or seeds can get stuck in the socket, causing irritation and dislodging the clot.
- Be Gentle with Oral Hygiene: After the first 24 hours, you can start gentle salt water rinses. When you brush, be extremely careful to avoid the extraction site itself.
The warning against smoking isn't just about suction. Nicotine constricts blood vessels, which slows down healing. For a clearer picture, it's worth understanding the significant health risks associated with smoking and how they directly impact your body's ability to recover.
Key Takeaway: Most cases of dry socket are entirely preventable. Following a few simple rules in the first few days is the best way to avoid this painful complication.
Want to learn more about the recovery timeline? Our detailed guide has more about dry sockets and when you can stop worrying. Taking these small, deliberate steps gives you the power to ensure your healing process is as comfortable as possible.
Global Trends in Dental Extraction Care
Getting a tooth pulled is one of the most routine dental procedures on the planet. But you might be surprised to learn that how people recover from it can look very different depending on where they live. Following a solid aftercare plan isn't just a good idea—it's a worldwide best practice for making sure you heal up quickly and without any nasty complications.
Healthcare systems, dental philosophies, and even patient habits vary from country to country, and that leads to some pretty interesting outcomes. Just look at the data on impacted tooth removals. One study found that these procedures jumped by a staggering 81% in Western Australia over just ten years.
Meanwhile, France saw a more moderate 36% increase, and England actually saw a 20% decrease. These numbers point to different clinical philosophies and treatment thresholds around the world. You can actually dig into the numbers and learn more about these global dental statistics to see why having a standardized recovery plan is so critical.
What these global differences really highlight is a simple, universal truth: it doesn't matter if you're in San Diego or Sydney, the fundamentals of a good recovery are the same. Taking care of yourself by prioritizing rest, eating the right foods, and keeping the area clean is your ticket to a smooth and successful healing process.
Your Top Questions Answered: Navigating Tooth Extraction Recovery
Even with a perfect game plan, questions are bound to pop up as you heal. It's completely normal. Having answers to the most common concerns can make all the difference, helping you feel more confident and in control of your recovery.
Let's walk through the questions we hear from patients every single day.
How Long Will This Pain Actually Last?
Honestly, the first 2-3 days are the toughest. That's when you'll feel the most discomfort. But after that peak, you should notice things getting progressively better each day. For most people, standard over-the-counter pain medication is plenty to keep them comfortable after day three.
Now, if the pain suddenly gets worse instead of better, pay attention. A severe, throbbing pain that radiates out from the socket is the classic calling card of a dry socket. If that happens, don't wait—call your dentist right away.
When Can I Brush My Teeth Like a Normal Person Again?
You can—and absolutely should—brush your other teeth the very night of your procedure. The key is to be incredibly gentle and give the extraction site a wide berth for the first 24 to 48 hours. Think of it as a no-go zone.
After that initial window passes, you can start carefully brushing the teeth adjacent to the empty socket.
Pro Tip: Don't spit! Spitting creates suction that can dislodge the crucial blood clot. Instead, just lean over the sink and let the water and toothpaste gently fall out of your mouth. You should be back to a careful but normal brushing routine for the whole area in about a week.
What Are the First Signs of a Dry Socket?
A dry socket has a few tell-tale signs, and they usually don't show up right away.
The biggest red flag is a sudden, deep, throbbing pain that starts 2 to 4 days after your extraction. This isn't just a little soreness; it's a significant pain that often travels toward your ear and doesn't seem to get better with your prescribed pain relief.
Other signs to watch for include:
- A persistent bad taste in your mouth or a noticeable odor.
- Taking a peek at the site (if you can) and seeing whitish-looking bone instead of a dark, reddish blood clot.
Is It Normal to Have Stitches in My Gums?
Yes, stitches are very common, especially if you had a wisdom tooth removed or a more complex extraction. They're there to help the gum tissue close up and heal properly.
The good news is that most dentists today use dissolvable stitches. These will just fall out on their own within a week or two, so don't be alarmed when you find a little thread in your mouth. If your dentist used the non-dissolvable kind, they'll have you come back for a quick and painless removal appointment. In the meantime, just do your best not to poke at them with your tongue.
Your comfort and health are what matter most to us at Serena San Diego Dentist. If any other questions come up during your tooth extraction recovery, or if you're ready to talk about restoring your healthy smile, we're here for you. Schedule your consultation with our expert team today.